How to Make Payments in Your Vue App Using Paystack


A short Introduction
Earlier this week, I completed a long overdue side project that makes your favorite movies available for purchase, can be added to a cart it can eventually be ordered. So basically an E-commerce web application for movies.
Things went pretty well till I had to decide on how to implement online payments. The popularly known Stripe initially came to mind as it is regularly recommended by many online tutorials. Knowing fully well that Stripe had recently acquired a Nigerian owned online platform that helped businesses in Africa get paid by anyone, anywhere in the world, Paystack .
Paystack already offers a properly detailed documentation on how to accept payments on your Vue App, but in this article, we will be implementing some code.
Prerequisites
This project was built with Vue.js and Node.js. You don't need to know how to write Node.js to follow through.
- Basic JavaScript Knowledge
- ES6 JavaScript
- State management with VueX
Lets Write Some Code
- This component gives some detail about the user's cart items. With the data stored in our Vue Store, mapGetters was used to get user and cart data.
NB: Please refer to Vue docs if these terms are strange to you
<template>
<div class="col-12 col-md-4 col-xl-2 col-lg-3 checkout_area">
        <div class="d-flex flex-column h-100">
          <div class="form h-75">
            <h1 class="h4 ml-2 my-4">Order Summary</h1>
            <hr />

            <div class="row my-3">
              <div class="col">
                <p class="h6">
                  Videos:

                  {{ Carts.length }}
                </p>
              </div>
            </div>
            <div class="row my-3">
              <div class="col">
                <p class="h6">Total: ₦{{ getTotal }}</p>
              </div>
            </div>
            <hr />
            <div class="row my-3">
              <div class="col">
                <p class="h6 mb-3">Shipping Method</p>
                <select
                  name=""
                  id=""
                  class="custom-select custom-select-sm"
                  v-model="shippingFee"
                >
                  <option value="4">Standard Shipping ₦4</option>
                  <option value="10">Fast Shipping ₦10</option>
                </select>
              </div>
            </div
          </div>
</template>
- To install and add the Paystack Vue package, which contains the Paystack JavaScript library.
npm install --save vue-paystack - Once the library has been installed, import into your application. In this case Carts.vue
<script>
import { mapGetters, mapActions } from "vuex";
import paystack from "vue-paystack";
export default {
  components: {
    paystack
  },
data() {
    return {
      shippingFee: 4,
    };
  },
 computed: {
    ...mapGetters([
      "Carts",
      "get_paystack_details",
      "getUserDetail",
      "getTotal",
    ]),
reference() {
      let text = "";
      let possible =
        "ABCDEFGHIJKLMNOPQRSTUVWXYZabcdefghijklmnopqrstuvwxyz0123456789";
      for (let i = 0; i < 10; i++)
        text += possible.charAt(Math.floor(Math.random() * possible.length));
      return text;
    }
</script>
- The Paystack component has 5 required props
- amount: The amount we're charging the customer. (The amount entered by the customer should be converted to kobo before it's submitted, this is done by simply multiplying the value by 100)
- email: All transactions on Paystack require a customer's email address.
- paystackkey: Remember, public keys for client-side code always
- callback: A function that will run after a successful transaction is completed
- close: A function that will run when the customer closes the Paystack Checkout
NB: You need to have opened an account with paystack to get a paystackkey
Paystack Module (imported in the store file)
The Paystack module contains data passed as props to the paystack component
const state = {
    paystackDetail: {

        PUBLIC_KEY: "pk_test_8ef45c88d78962360e0c98weddefsa494724c8142",
        close: () => { console.log("Closed payment portal -_-");    }
    }
}

const action = {
processPayment: ({getters}, payload)
    //on succesful payment, create the order and send to the server
    let order = {
        videos:getters.Carts,
        customerId: getters.getUserDetail._id,
        total: getters.getTotal,
        paystackReference: payload.reference,
        shippingMode: getters.getShippingFee == 10 ? 'Fast' : 'Standard',
        shippingFee: getters.getShippingFee
    };

    let token = localStorage.getItem('token');

    axios('https://emovies-ng-api.herokuapp.com/api/orders/order', {
        method:'POST',
        data: {
            ...order
        },
        headers:{
            'Authorization': 'Bearer ' + token,
            'Content-Type':'application/json'
        }
    } )
 }

const getters = {
    get_paystack_details: (state) => state.paystackDetail
}

const mutation = {
    update_paystack_detail: (state, payload) => state.paystackDetail = payload
}

export default {
    state,
    action,
    getters,
    mutation
}
Paystack Component
<paystack
            :amount="parseInt(getTotal * 100)"
            :email="getUserDetail['email']"
            :paystackkey="get_paystack_details['PUBLIC_KEY']"
            :reference="reference"
            :callback="processPayment"
            :close="get_paystack_details['close']"
            class="btn btn-dark w-100 mt-5"
          >
            Pay ₦{{ getTotal }}
          </paystack>
Below, is our Cart component, with the Paystack component as a button.
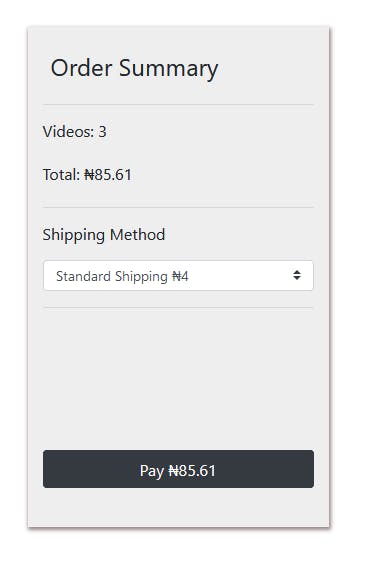
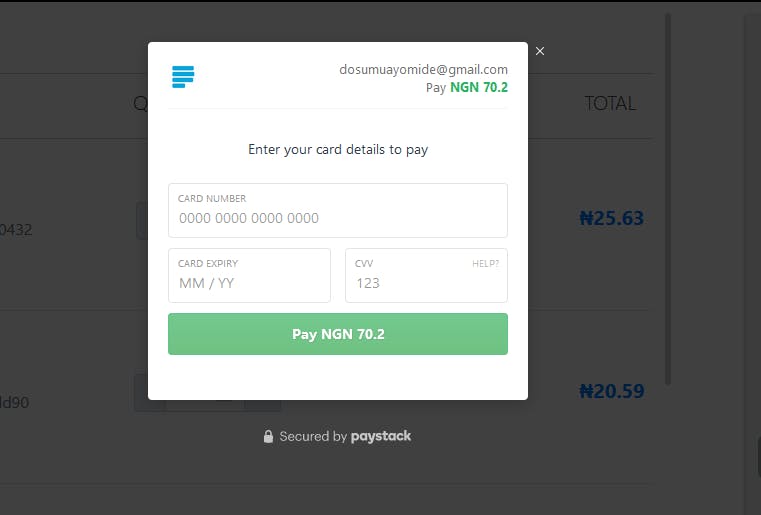
When a click event is fired on this component, the payment modal fades in with a form to collect user data (card details).
Paystack Modal
Conclusion
Well that was fun. Implementing Paystack in your Vue application is simple and fun all together. The article covered installing the vue-Paystack library and showed how to integrate the library in our application.
I hope this article has been of great help. You can check out the link to the complete code on github